Creating Your Own Routes
This topic shows how to map your own activity route in Strava and lists the route stats generated by this feature, Route Builder.
This Strava features requires subscription and is only available through desktop web browser.
Steps
- On desktop web browser, hover over the Explore tab and select Create a Route.
- In the My Routes page, click on Create New Route.
- In the Route Builder, select Run as your activity and toggle preferences, such as Use Popularity and Min. Elevation.
- To start mapping, double-click your cursor on your selected spot on the map. You have created a waypoint.
- Repeat Step 4 to create a subsequent waypoints along your given route. The Route Builder should connect the route between the waypoints.
- Once you are satisfied, click Save.
- Select your Run Type, name your route, and choose whether to keep your route private.
- Click Save. Your route is now saved in the My Routes page.
Video by Rob Humphreys
Before adding your first waypoint, turn on What Is a Global Heatmap? under Map View Options to view popular routes.
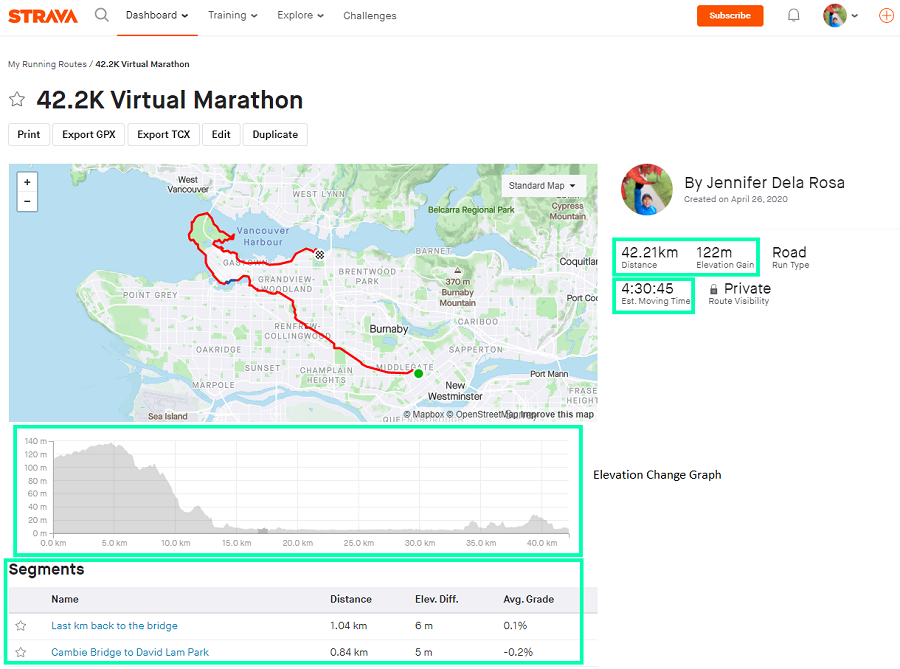
Route Stats
The route stats that are generated in the Route Builder include:
- Distance
- Elevation gain
- Estimated moving time
- Elevation change graph
- Segments
Use Route Builder to plan your hill training runs by viewing the elevation gains.
See Run Stats for details on their definitions.